
Ragdoll Frenzy Weapons & Tools Tier List
Chaos potential, control, multiplayer disruption, and beginner friendliness for every major toy in the sandbox.
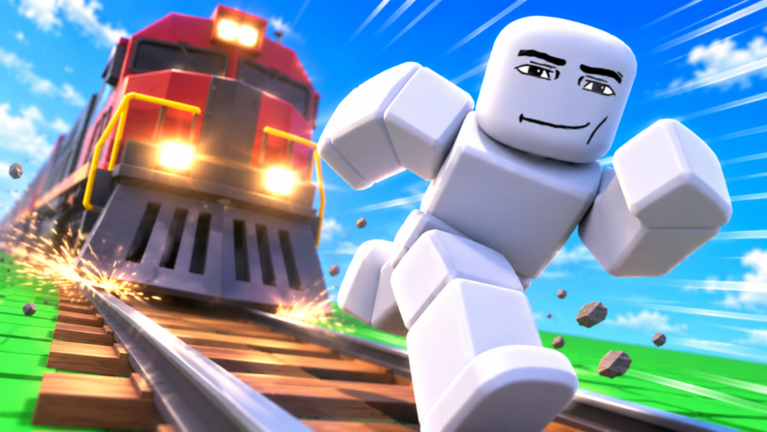
Ragdoll Frenzy is not a competitive arena with a single “correct” loadout. It is a physics sandbox where the best tool depends on whether you want precision grabs, explosive punchlines, train-track comedy, or slow-mo finishers. This tier list ranks the major weapon and tool families using four criteria: chaos potential, control, multiplayer disruption, and beginner friendliness. Use it as a starting map, then refine your own taste after a few sessions. For the broader meta overview, visit the Tier List Hub. For mechanical how-tos, jump to Grab, Shoot & Blast and Slow-Mo Finishers.
Ranking criteria
- Chaos potential — How quickly the tool turns a quiet lobby into flying limbs, debris, and laughter.
- Control — How precisely you can aim outcomes (limb hits, throw arcs, timing windows).
- Multiplayer disruption — How much the tool changes a shared server of up to 12 players without needing grief intent.
- Beginner friendliness — How fast a new player gets a satisfying result without reading a manual.
Tiers run S → F. S means “almost always worth learning first.” F means “niche, awkward, or easy to misuse.” Mid tiers are situational stars.
S tier
Grab (unequipped)
Unequipped grab is the foundation of Ragdoll Frenzy. Empty hands let you pick up dummies, reposition them toward machines or tracks, set throw angles, and stage finishers before you ever touch a gun. Grab scores near-perfect control, excellent beginner friendliness once you learn distance and release timing, and huge multiplayer value because you can set up shared bits for friends. Chaos is medium alone and sky-high when you feed grabs into trains, blasts, or stretch machines. If you only master one tool family, master grab.
Slow-mo (meta tool)
Slow motion is listed here as a meta tool, not a damage type. It multiplies every other toy: grabs look juicier, gun impacts read clearly, blast waves become watchable, and train collisions turn into highlight clips. Control goes up because you can correct aim mid-action; chaos presentation goes up because audiences can actually see what happened. In multiplayer, slow-mo is the difference between “something exploded” and a shared cinematic. Beginners should enable it early while learning timing. Treat it as a lens you apply on top of S-tier setups rather than a standalone weapon.
A tier
Explosives / blast tools
Blast tools deliver instant spectacle. Toss, place, or trigger an explosive near clustered dummies and the sandbox answers with ragdoll showers. Chaos potential is elite; control is medium because blast radius and physics settle decide more than pixel-perfect aim; multiplayer disruption is high when several players stack blasts. Beginners get fast dopamine, but advanced players learn spacing so they do not erase their own staged grabs. Pair blasts with slow-mo and pre-positioned bodies for cleaner “director” moments.
Environmental train
The train is an environmental weapon: you do not equip it so much as stage for it. Drag or throw dummies into the path, step back, and let the world finish the joke. Chaos is enormous, control is about positioning and timing rather than trigger pull, and multiplayer disruption is legendary when a full lobby watches the same pass. Beginner friendliness is surprisingly good—once you know where the train runs, the bit is obvious—but mistiming means a dud pass. Learn the route, then combine with grab setups for A-tier consistency.
B tier
Machines (stretch / cheese pull)
Machines—especially stretch and cheese-pull style devices—are why short-form clips keep discovering Ragdoll Frenzy. You grab a dummy, feed it into the machine, and let the contraption do the theatrical work. Chaos is high and meme-friendly; control depends on correct seating and whether the machine is free; multiplayer disruption is strong because everyone understands the punchline. Beginners may need a minute to find the machine and the correct approach angle, which keeps this in B instead of S. Once you know the loop, it becomes a content engine.
Handgun / starter guns
Starter handguns and early firearms teach aimed chaos. Limb shots, center-mass impacts, and follow-up grabs after a knockdown are the core loop. Control is better than pure blasts; chaos is solid but less map-wide; multiplayer disruption is moderate unless several people open fire at once. Beginner friendliness is high because “point and shoot” needs little explanation. Guns climb toward A when you mix them with slow-mo and grab repositioning, covered in depth on Grab, Shoot & Blast.
C tier
Melee blunt
Blunt melee (clubs, bats, and similar impact tools) rewards spacing and camera aim. You get readable hits and satisfying launches without deleting the whole scene. Chaos is medium, control can be high in skilled hands, and multiplayer disruption is lower than blasts or trains unless you chase other players’ staged setups. Beginners sometimes swing wildly and miss the physics joke; veterans use melee to nudge bodies toward tracks or machines. Keep blunt tools in the kit for intimate, up-close clips.
D tier
Fire tools
Fire tools look dramatic on camera and can cascade across props or dummies, but they are harder to aim as a precise joke. Chaos can spike; control often feels slippery; multiplayer servers may get messy fast when flames outlast the bit you intended. Beginners can panic-toggle and lose the scene. Fire earns D as a specialty garnish—great after a grab or machine setup, risky as your only plan. If you want clearer storytelling, prefer slow-mo plus grab or a single clean blast.
F tier
Nothing here is literally unusable, but random hotbar spam without a plan belongs in F. Switching tools every half-second, ignoring grab setups, and fighting the train instead of staging for it wastes the sandbox. The “weapon” is the physics system; tools are verbs. An F-tier session is one where you never stop to aim, stage, or watch the result.
Suggested learning order
- Unequipped grab and simple throws.
- Slow-mo while you practice.
- Starter guns for aimed impacts.
- One blast tool for spectacle.
- Train timing and machine feeds.
- Melee and fire as flavor.
Multiplayer notes
Shared servers reward readable bits. Announce (or emote) before a big blast if friends are staging nearby. Do not erase someone’s cheese-pull setup for a cheap explosion unless the lobby is clearly playing free-for-all chaos. The Tier List Hub and finisher guide help you pick tools that photograph well when twelve people are watching.
Final take
S: Grab, Slow-mo. A: Blasts, Train. B: Machines, Starter guns. C: Melee blunt. D: Fire. F: Planless spam. Rankings will shift as JustEvolve adds toys, but the criteria—chaos, control, disruption, beginner joy—should stay useful. Practice the loops on Grab, Shoot & Blast and polish the camera moments with Slow-Mo Finishers.
Frequently Asked Questions
Quick answers players ask about Ragdoll Frenzy every day.
Why is unequipped grab ranked S tier?
Grab sets up every other highlight—throws, machines, trains, and finishers. It offers the best mix of control and creative chaos for new and veteran players.
Is slow-mo really a weapon?
It is a meta tool. Slow-mo does not replace guns or blasts; it makes their impacts readable and turns ordinary hits into shareable finishers.
Why are fire tools lower than blasts?
Fire looks cool but is harder to aim as a clean punchline and can overwhelm a multiplayer scene. Blasts give faster, clearer spectacle with less lingering mess.
Does this tier list change after updates?
Yes. When JustEvolve adds tools or retunes physics, rankings can move. Re-check this page and the Tier List Hub after major patches.
What should beginners equip first?
Practice unequipped grab first, enable slow-mo, then try a starter handgun. Add blasts and machines once you can stage a dummy on purpose.